
Acoustic wall panels are an excellent solution for improving sound quality in any space, be it a home theater, office, studio, or classroom. Not only do they enhance the aesthetics of a room, but they also help reduce noise, echoes, and reverberations, creating a more comfortable environment for various activities. Installing acoustic wall panels may seem like a daunting task, but with the right approach and tools, it can be a straightforward process. Here’s a step-by-step guide on how to install acoustic wall panels:
-
Assess the Room: Before you begin, evaluate the room’s acoustics and identify the areas where sound absorption is needed the most. This will help determine the quantity and placement of the acoustic panels.
-
Gather Materials and Tools: You’ll need acoustic panels, adhesive (if not using adhesive-free panels), a tape measure, a level, a pencil, a utility knife or scissors, and a stud finder (if mounting panels to walls).
-
Prepare the Surface: Ensure that the wall surface is clean, dry, and free of dust or debris. If necessary, use a mild cleaner to remove any dirt or grease that could affect the adhesion of the panels.
-
Plan the Layout: Decide on the arrangement of the panels, considering both aesthetics and functionality. You can create patterns or clusters to achieve the desired look while maximizing sound absorption.
-
Measure and Mark: Use a tape measure and a pencil to mark the positions where the panels will be installed. Use a level to ensure that the markings are straight and aligned.
-
Apply Adhesive (if necessary): If your acoustic panels require adhesive, follow the manufacturer’s instructions to apply it evenly to the back of each panel. Be sure to use the appropriate adhesive for the type of wall surface (e.g., drywall, concrete).
-
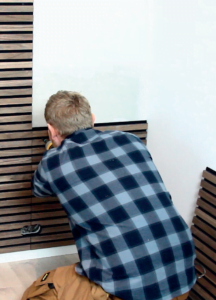
Mount the Panels: Carefully place each panel onto the marked positions on the wall, pressing firmly to ensure good adhesion. If you’re mounting panels to walls with studs, use a stud finder to locate the studs and secure the panels using screws and wall anchors for added stability.
-
Trim (if necessary): If the panels need to be trimmed to fit around corners or obstacles, use a utility knife or scissors to cut them to the desired size and shape. Take precise measurements and make accurate cuts to achieve a neat finish.
-
Allow for Drying Time: If you’ve used adhesive, allow sufficient time for it to dry and cure according to the manufacturer’s recommendations before touching or applying pressure to the panels.
-
Finishing Touches: Once the panels are securely in place, step back and admire your handiwork! Take the opportunity to rearrange or adjust the panels as needed for optimal sound absorption and visual appeal.
By following these simple steps, you can effectively install acoustic wall panels to enhance the acoustics and aesthetics of any space. Whether you’re a DIY enthusiast or hiring a professional installer, properly installed acoustic panels can make a significant difference in the sound quality and overall ambiance of your environment.